WILLY

 Hi! My name is Joe and this is the status page of my 1946
Willys CJ2A s/n
CJ2A18311 named Willy. While most vehicles are called she, WILLY is definitely a HE.
He's rough around the edges, a little loud, muddy, and strong. This is my crude
attempt at a web page to show all that are interested some of the progress that
has been creeping along. (Slower than WILLY is in 1st gear low range!)
I'll update the page as I get time. Just double click on any picture and
the thumbnail will show the full picture. I bought WILLY for $1100 in 1980. WILLY and I got along well in the mud puddles of
South Eastern Pennsylvania. Even with open axles, we forged many a trails
near the Philadelphia airport. My buddy Cesare and his V6 powered 1968 C101 were usually right next to us. We
had a lot of fun getting stuck and unstuck together.
Hi! My name is Joe and this is the status page of my 1946
Willys CJ2A s/n
CJ2A18311 named Willy. While most vehicles are called she, WILLY is definitely a HE.
He's rough around the edges, a little loud, muddy, and strong. This is my crude
attempt at a web page to show all that are interested some of the progress that
has been creeping along. (Slower than WILLY is in 1st gear low range!)
I'll update the page as I get time. Just double click on any picture and
the thumbnail will show the full picture. I bought WILLY for $1100 in 1980. WILLY and I got along well in the mud puddles of
South Eastern Pennsylvania. Even with open axles, we forged many a trails
near the Philadelphia airport. My buddy Cesare and his V6 powered 1968 C101 were usually right next to us. We
had a lot of fun getting stuck and unstuck together.Since WILLY was the first vehicle I owned and I just finished my first year of college, money was tight and he was my only mode of transportation. Repairs had to be quick and cheap, as this was my only vehicle to commute to school. Upgrades were only when necessary and were not always the best, just quick. The Flat head motor smoked, so it was was re-built and installed. After a few years I decided it didn't seem to have enough OOOMMMPPPHH. Also, with rods that are over 9 inches long and 5.38 gears, it sounded like it was going to explode at 50 miles an hour. A 231 Buick odd fire V6 was rebuilt and installed. Now that got the ol' WILLY moving. It'd lift the front wheels if I popped the clutch just right. Not the smartest thing to do, but it was FUN for a teenager!. The old Ross steering box was, in a word, EXCITING to drive on the highway. There was a LOT of play, about half a turn at center. I got used to it, but eventually decided to install a Saginaw steering box. This is definitely one of the most appreciated modifications. I replaced the model 25 front axle with a model 27 after it died in a snow storm. (The 27's been replaced too, read on). Somewhere in those years the Dana 41 and T-90 transmission went the way of all flesh. I swapped in an offset flanged Dana 44 with matching 5.38's and a T-98 transmission. After about 6 years, I decided, WOW I COULD OF HAD A V8! I rebuilt a 4 bolt main Corvette LT-1 327 cubic inch, 350 horse engine. It has a 350 c.i.d. crank, camel back heads, and forged pistons with about a 9.5:1 compression ratio. It's a good engine that will run on most gas. With the aid of Advance Adapter motor mounts and adapters, in went the Chevy 350 with the removal of the front cross-member. WILLY liked to go, but he sure didn't like to stop. I swapped a pair of 11" drums on the front and that helped a lot, but it wasn't nearly enough.
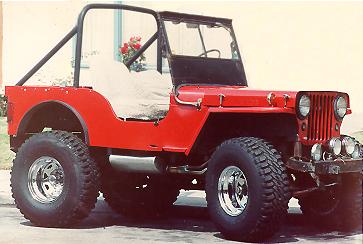
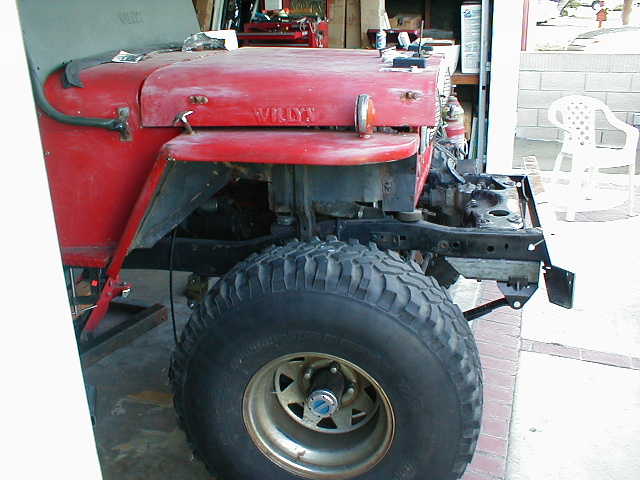
Here is a picture of WILLY before I took him off the road for the last MAJOR ground up re-build. He is shown with the original style leaf springs. I think it had 12 leaves in the back and 10 in the front (I'll check and update) and 35" BFG Mudders. I could jump up and down on the frame without the springs flexing.
Needless to say these short springs did not have much articulation, and it rode rough but it was also all over the road. But then, that's what a 1946 Jeep was supposed to ride like. This last rebuild originally started out solely as a new set of smaller 33 inch BFG tires to correct for his poor handling due to sidewall flex on the big 35's. The tires slightly corrected the situation, but they were't what needed attention. The problem was a poor body lift, a very patched up frame that was over 50 years old, and an antiquated suspension. I decided to put a "new" frame from a 1970's CJ5 to put under WILLY. Jason over at Tri-county had a NICE CJ2A with a similar 1970's frame and outboard suspensions. He had these REALLY flexi "SoftRide" springs by Skyjacker that looked like they'd articulate anywhere. I measured his, procured a frame and removed all the spring perches to mount the rear springs outboard. I wanted to box the frame, and then I discovered a later CJ5 frame from the 1980's that already was factory boxed. CJ frames from this period have the wider frame in the rear, so the springs are as wide as my original would have been mounted outboard. The decision to use this newer frame was a no-brainer. Just e-mail me at Jeep at Ham Contact Dhat com.
All the thumbnails below are hyperlinks to a bigger picture. Please let me know what you think, or if you have any suggestions. BTW, I'm always looking for Warn Over Drive parts if you have any laying around.
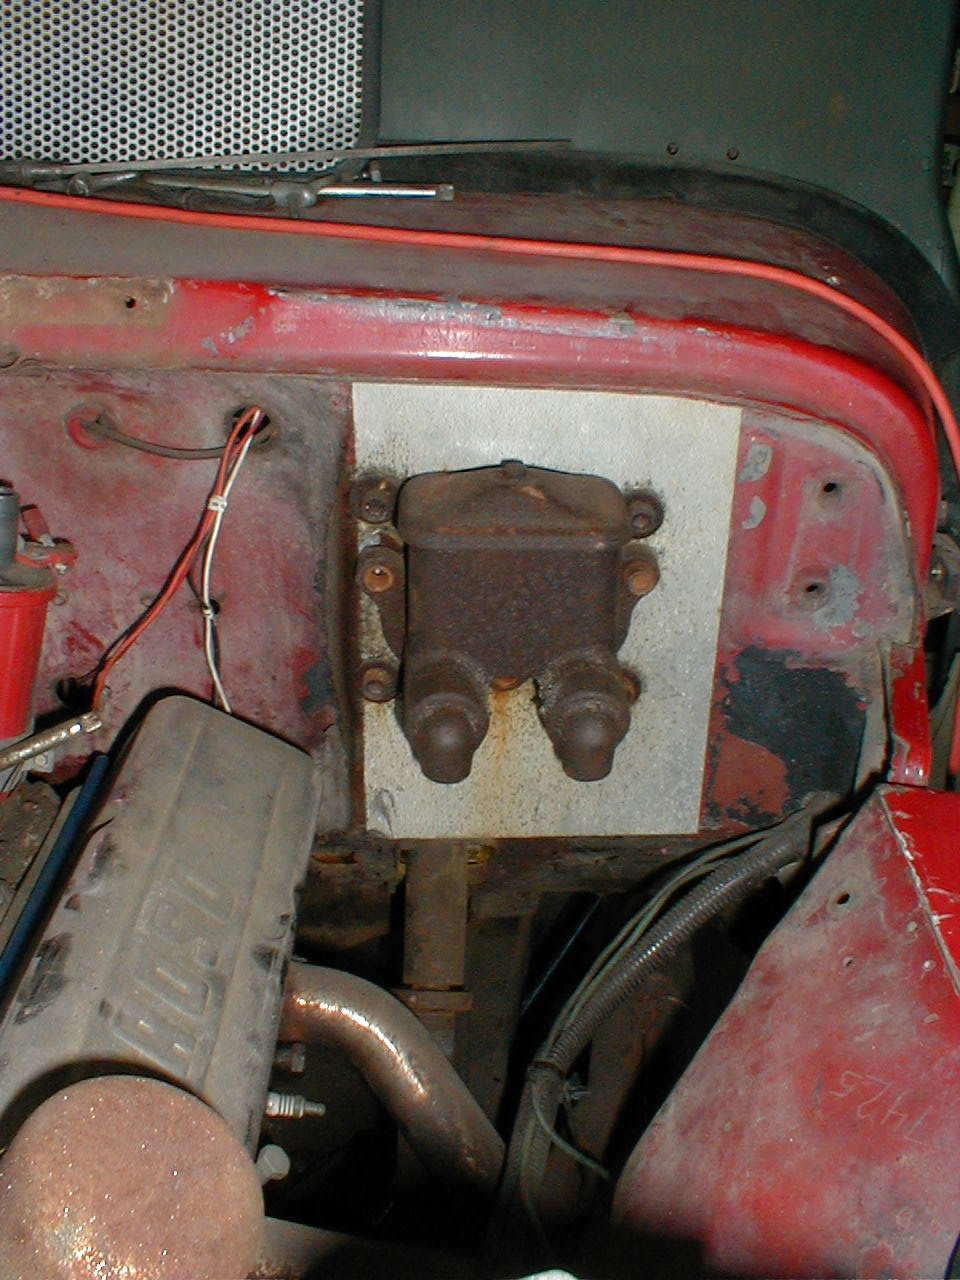
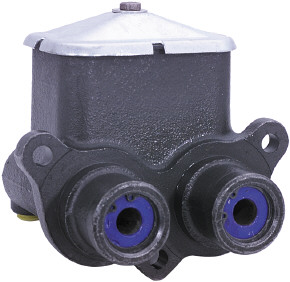
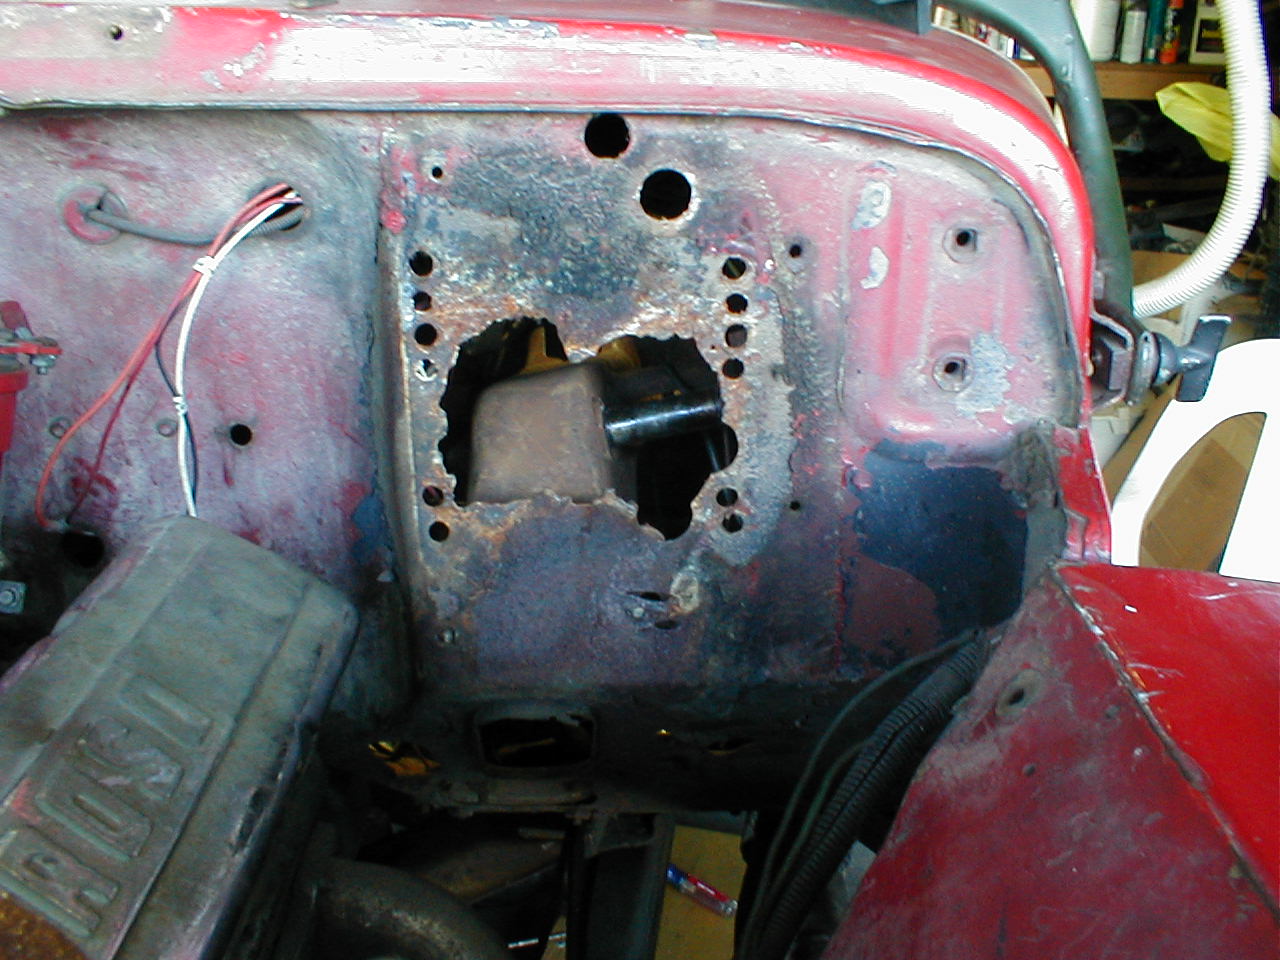
This is a picture of the tandem master cylinder for the Brakes and clutch I
installed this around the late 1980's
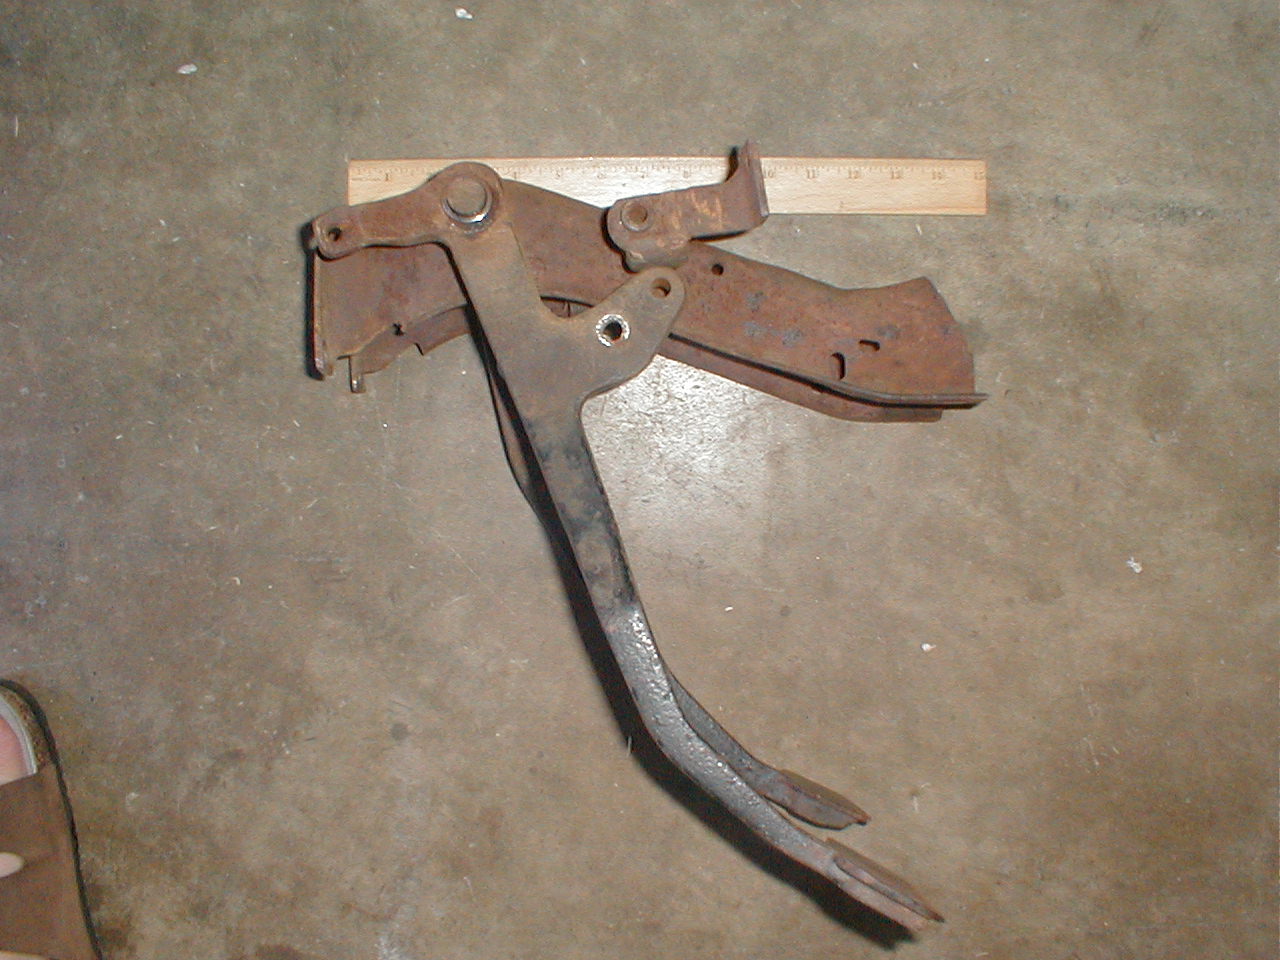
This is what it looked like from the inside, showing the pedals and the backing
plate.
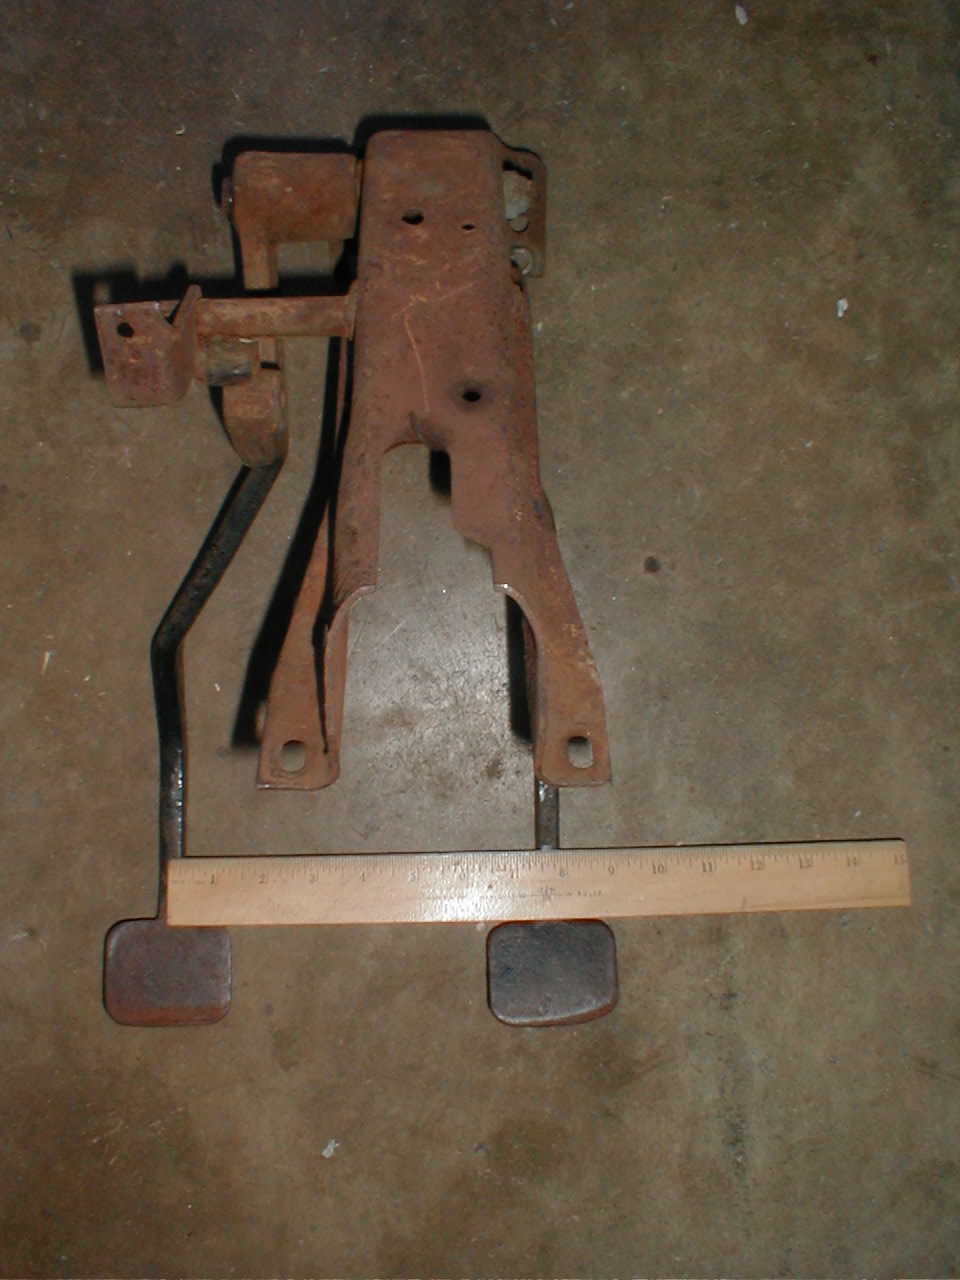
This is a picture of the pedals that went with the tandem Master Cylinder
showing the measurements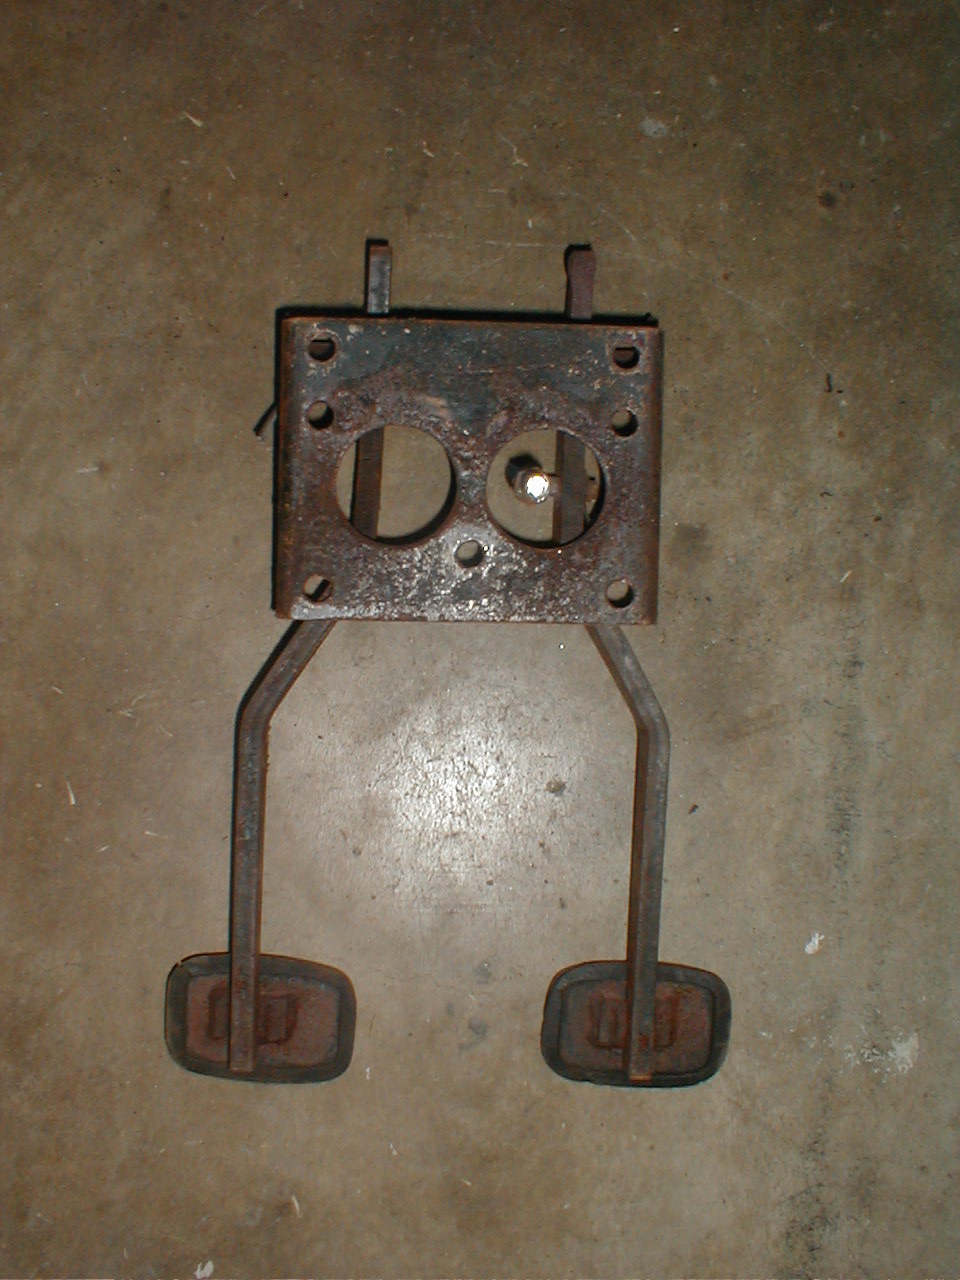
 I decided that being able to stop in under 500 yard would be a good thing, so I
installed Disc brakes.
I decided that being able to stop in under 500 yard would be a good thing, so I
installed Disc brakes.
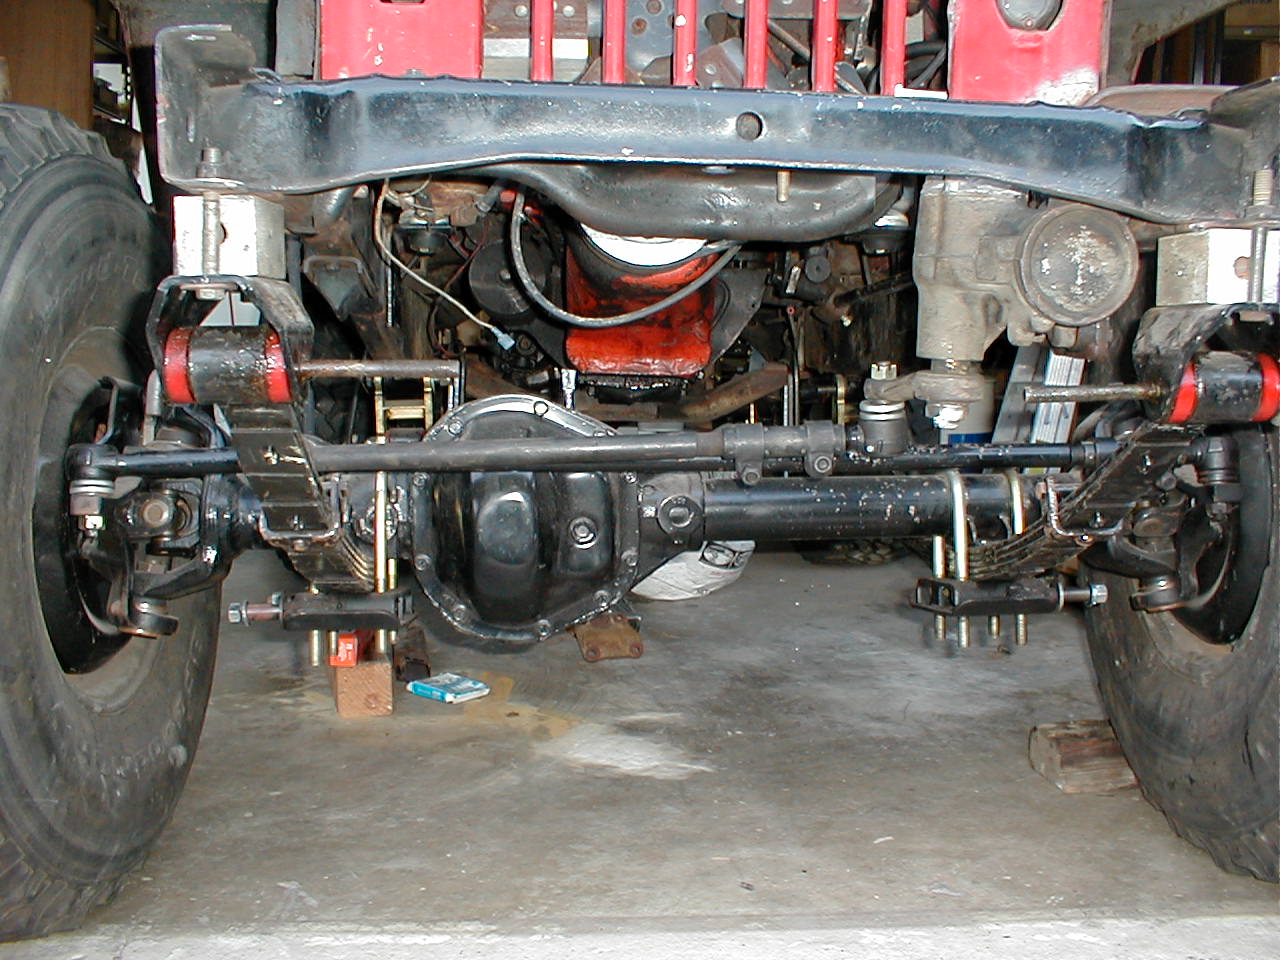
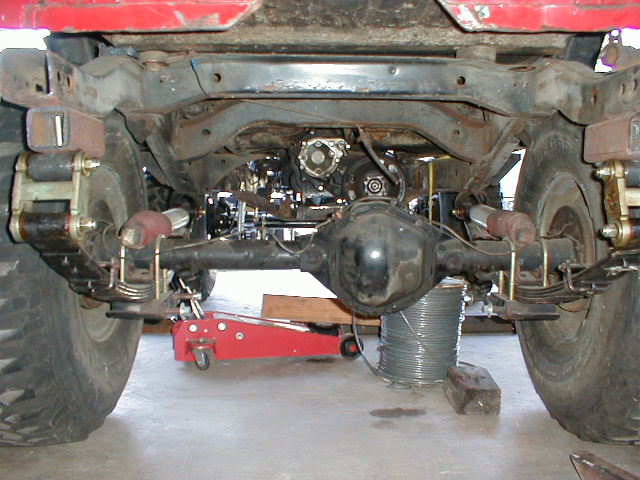
This of course meant an upgrade from the Dana 27 to Dana 44. It has all
heavy duty outer components and a Detroit Locker.
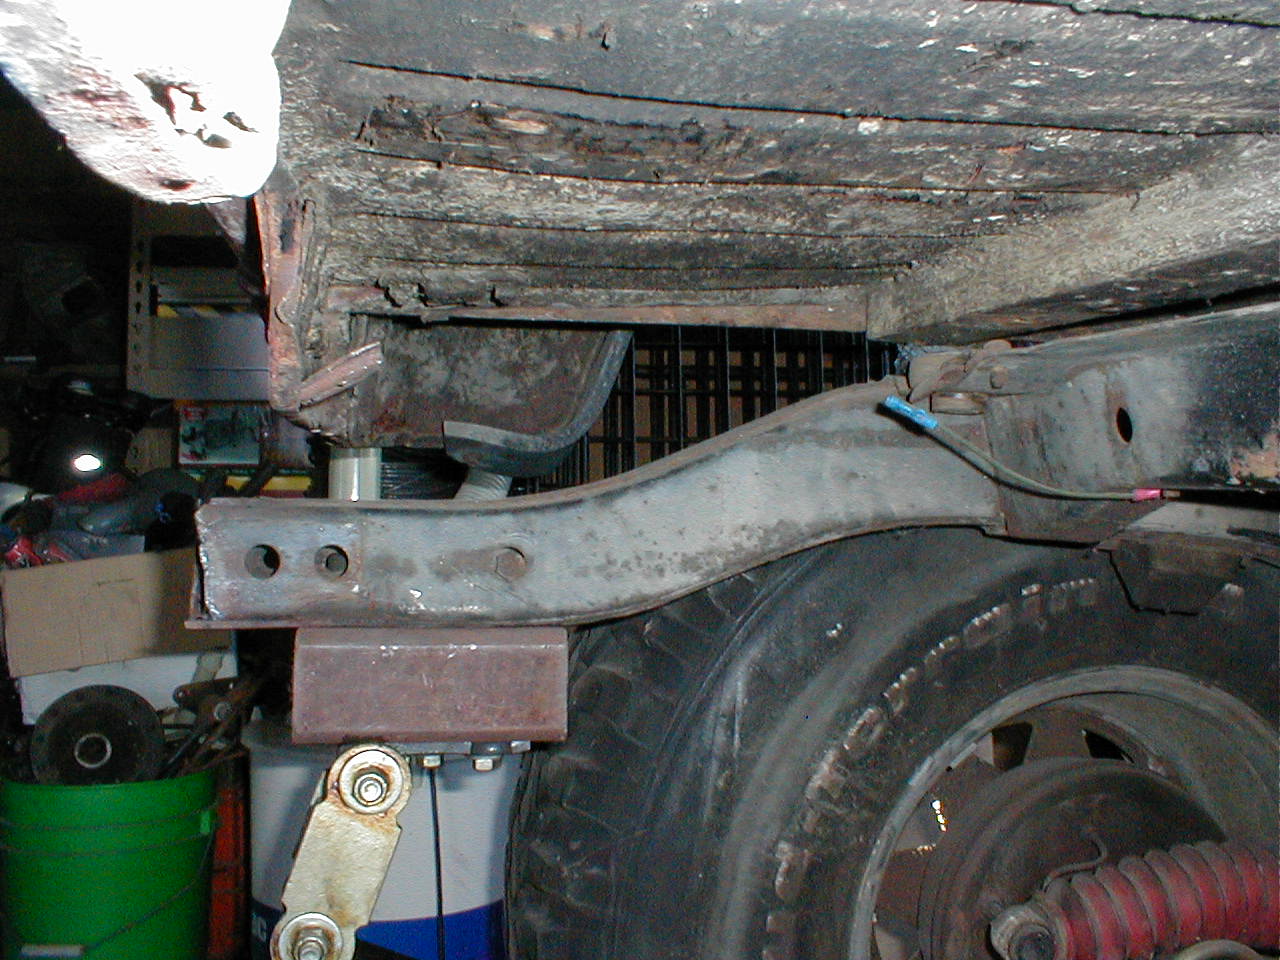
I decided at this point I was going for a shackle reversal. I didn't want to increase the wheelbase from 80" to the CJ5's 84, as I thought
it might look too unnatural. I decided on 82.75", as this allowed me to
use some of the original bolt holes for the front suspension. In
hindsight, I might have just left it at 84". This is the first stage at
mounting the front spring perch and spacer.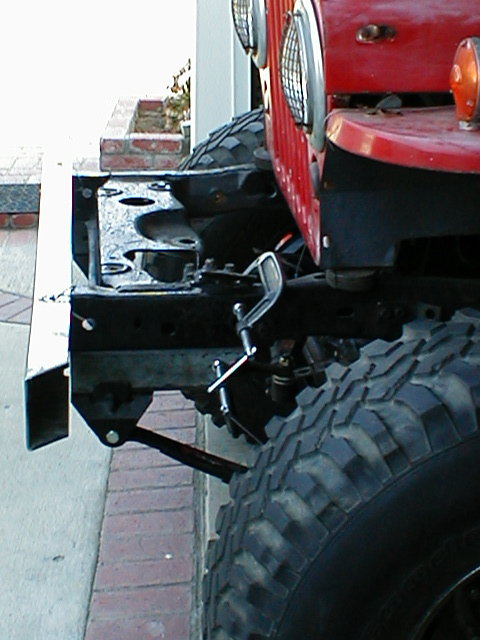
Here is a picture of the front spring perch spacer sitting on the tire.
It is cut like a piece of Rigatoni macaroni and goes between the spring perch
and the frame. The pointy side goes on the lower side in the front,
I would have needed to notch it to clear the bumper. You can see a small silver
block that I used as a temporary spacer to check things out.
Here it is in a trial fit, before I cut the from diagonal on the spring perch
spacer. The leading edge of the spacer is straight up and down here and the bumper would need to mount out further to clear it.
This is after I cut the leading edge of the space and welded in the spring perch
spacer.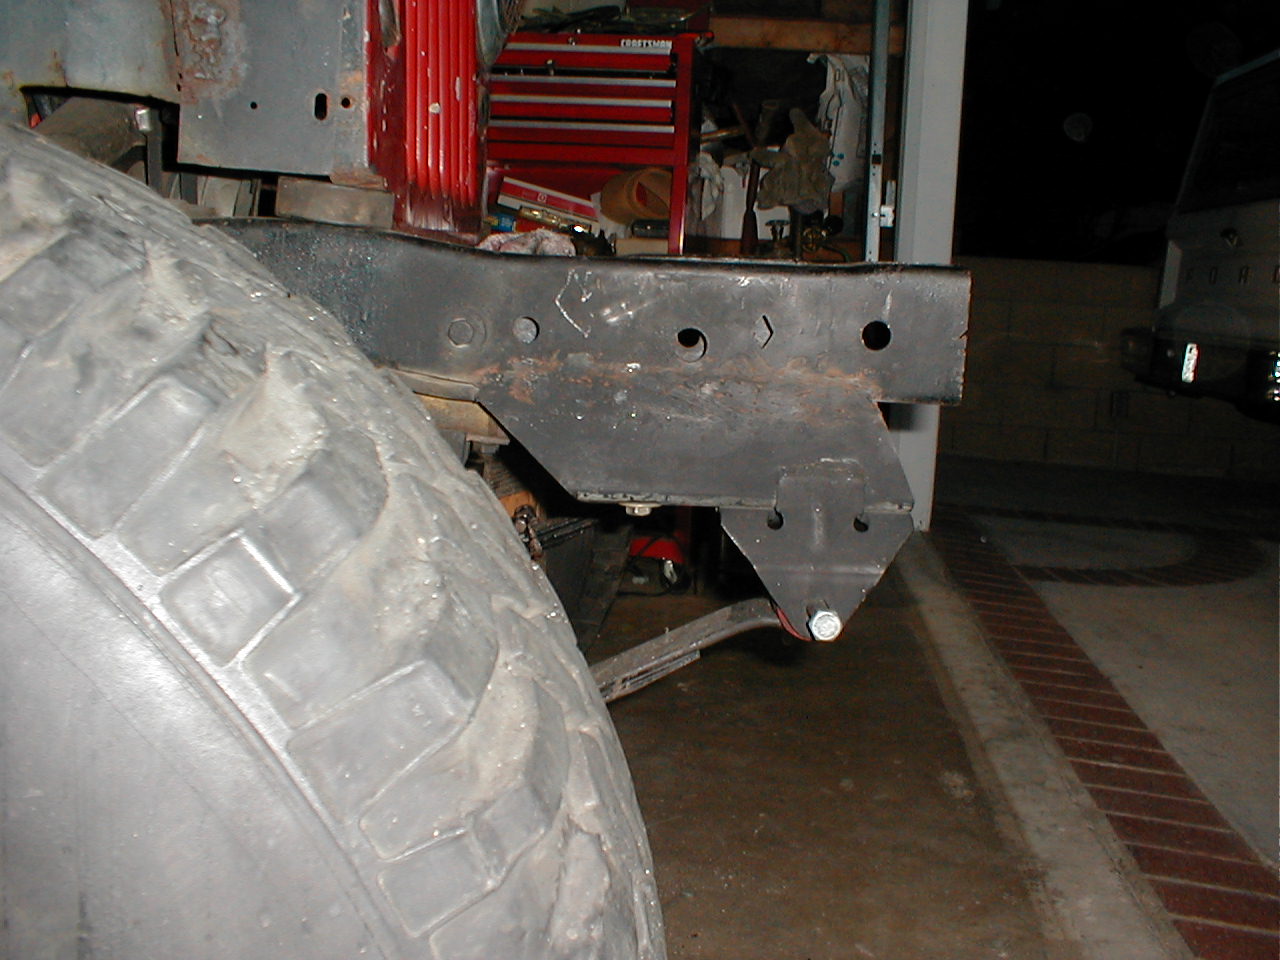
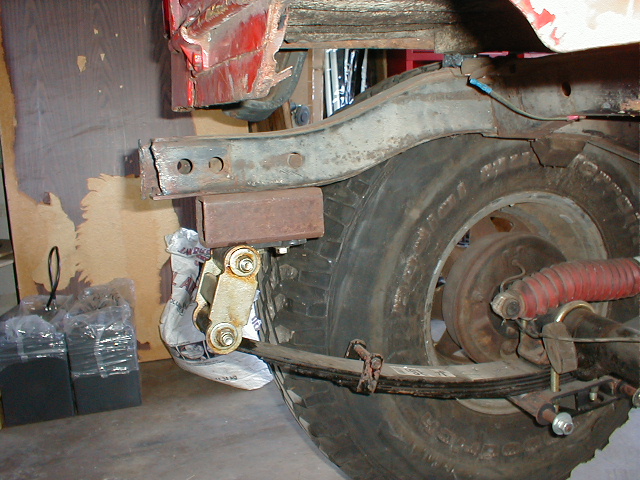
This is the front trailing spring mount. Notice that it has the shackle
trailing behind the mounting point, which is opposite of the factory front.
(though it is the same in the sense that it points away from the spring).
I saw one of these peel back in an accident, and decided this would be the best
way to mount it.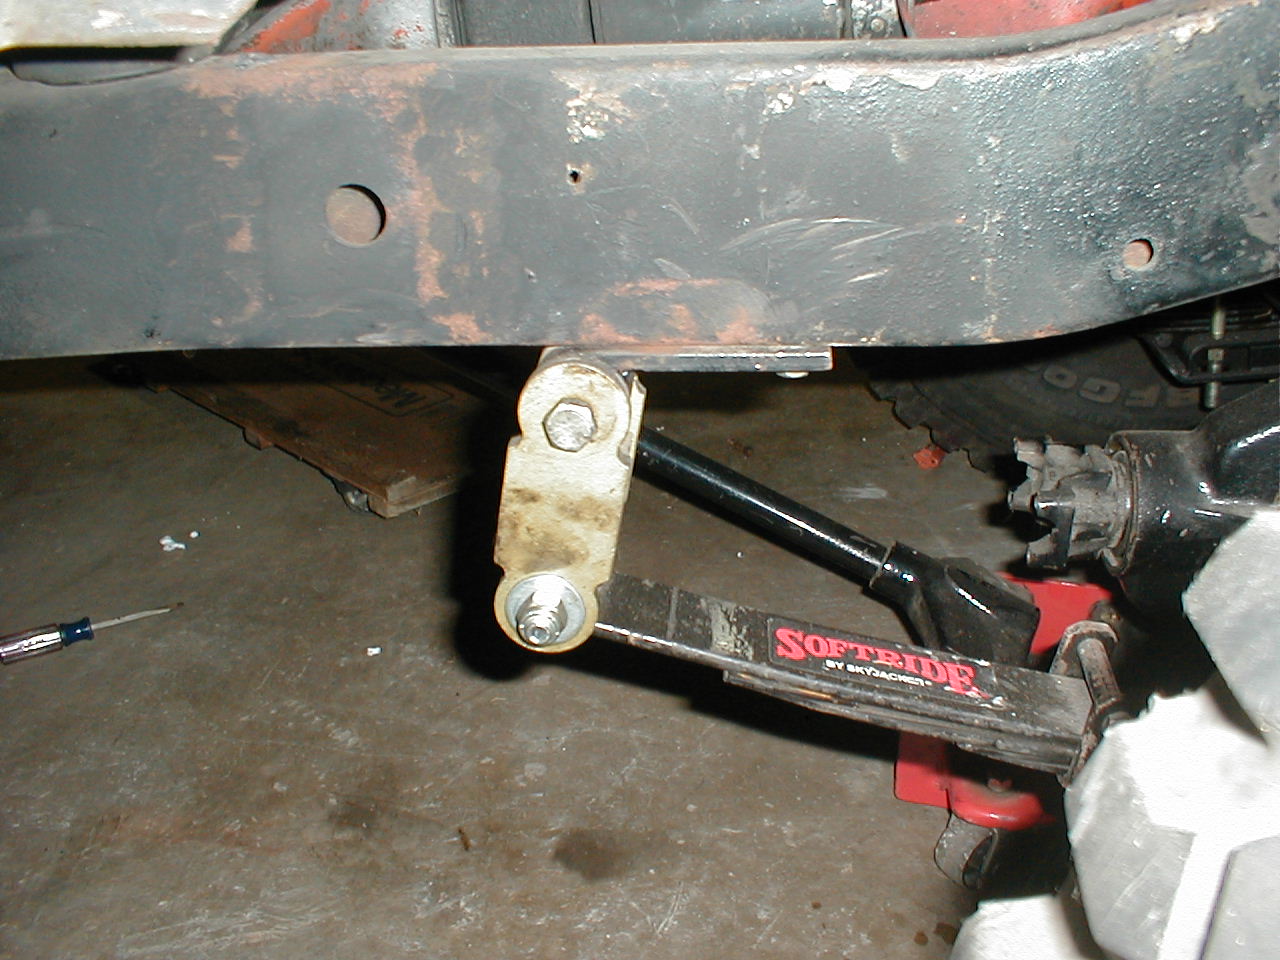
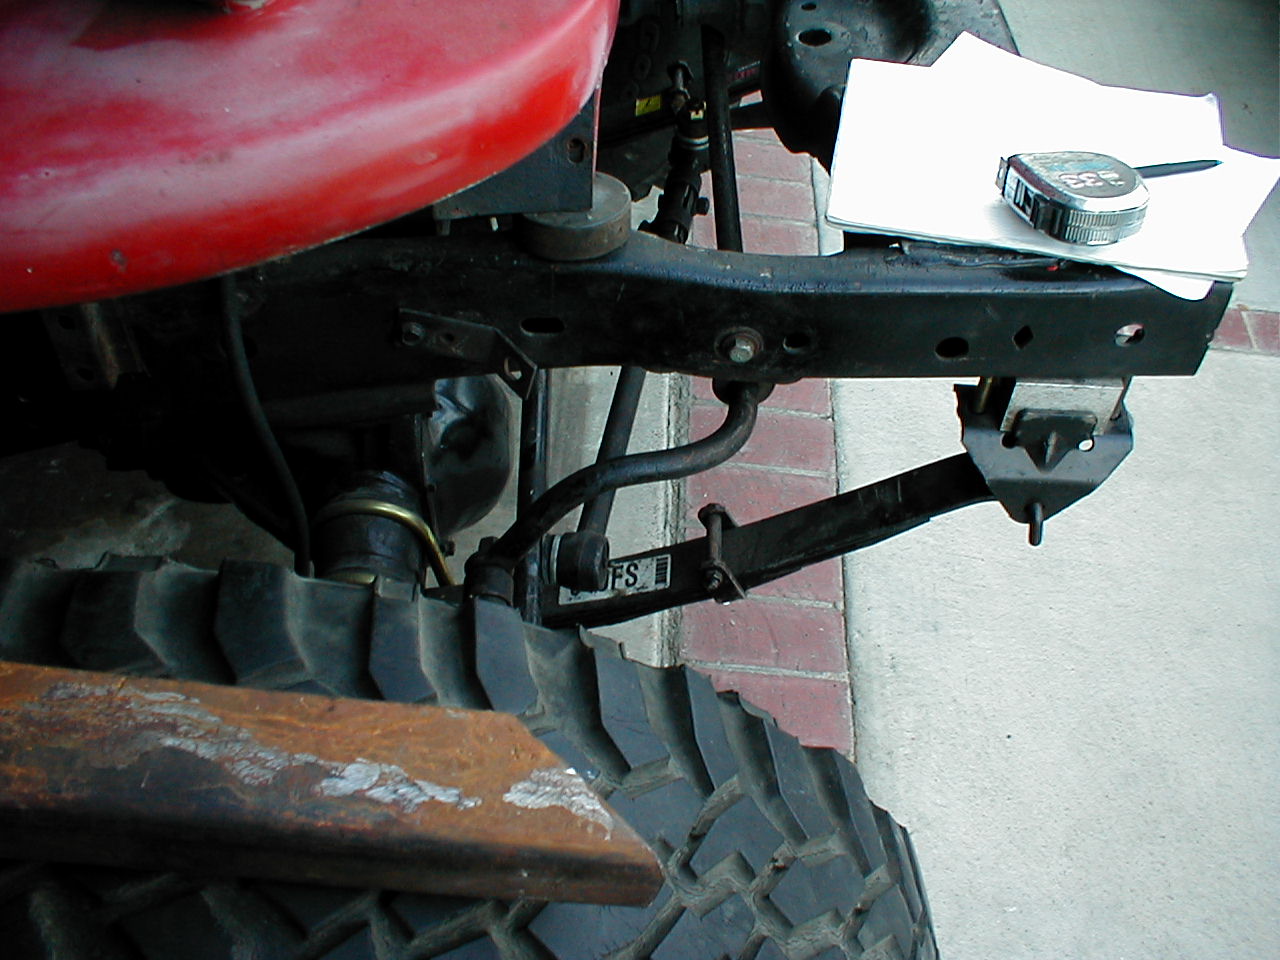
I had to modify the sway bar mounts in order to establish match the 82.75
inch wheelbase.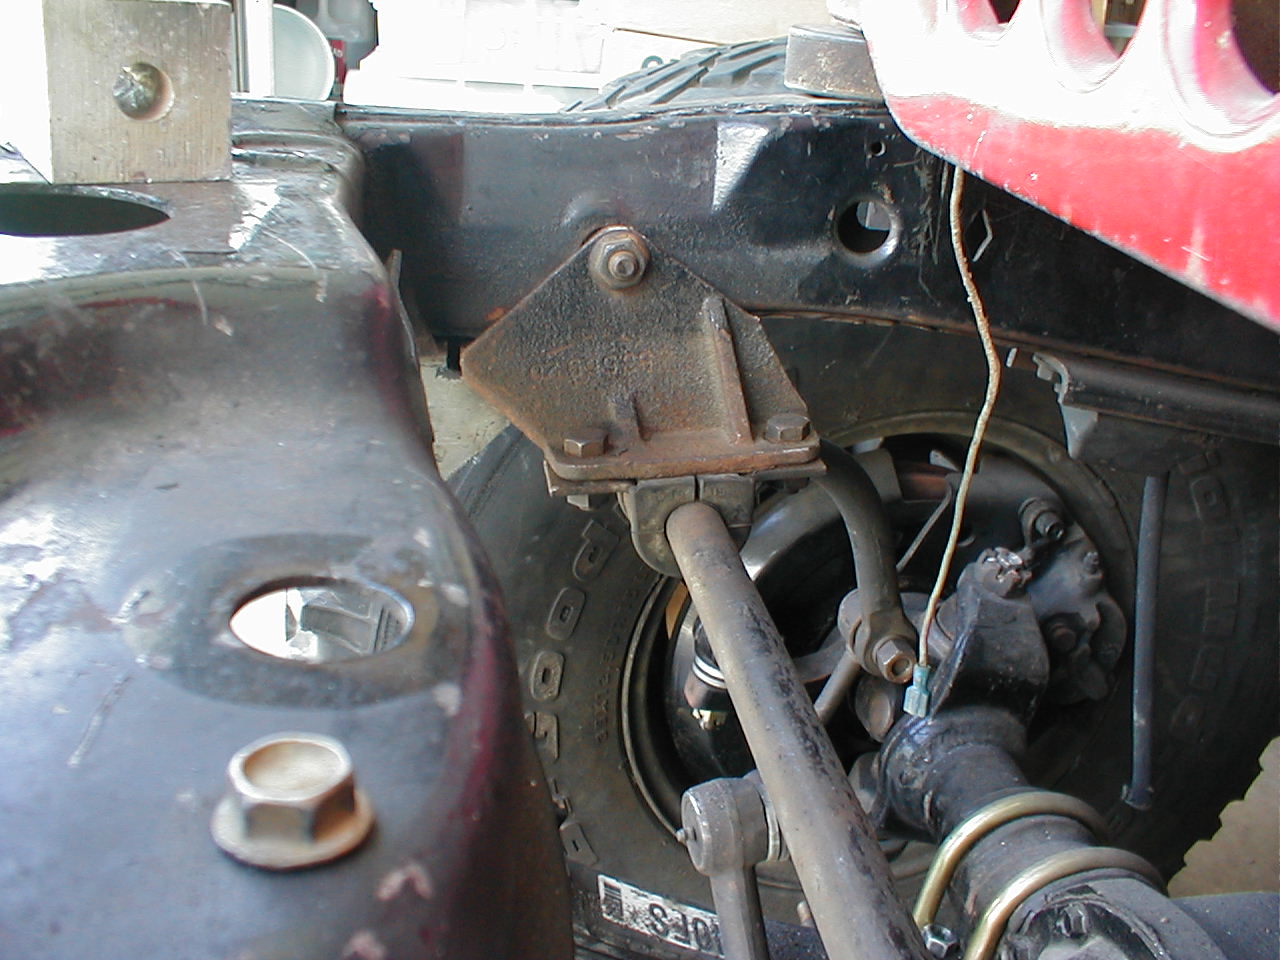
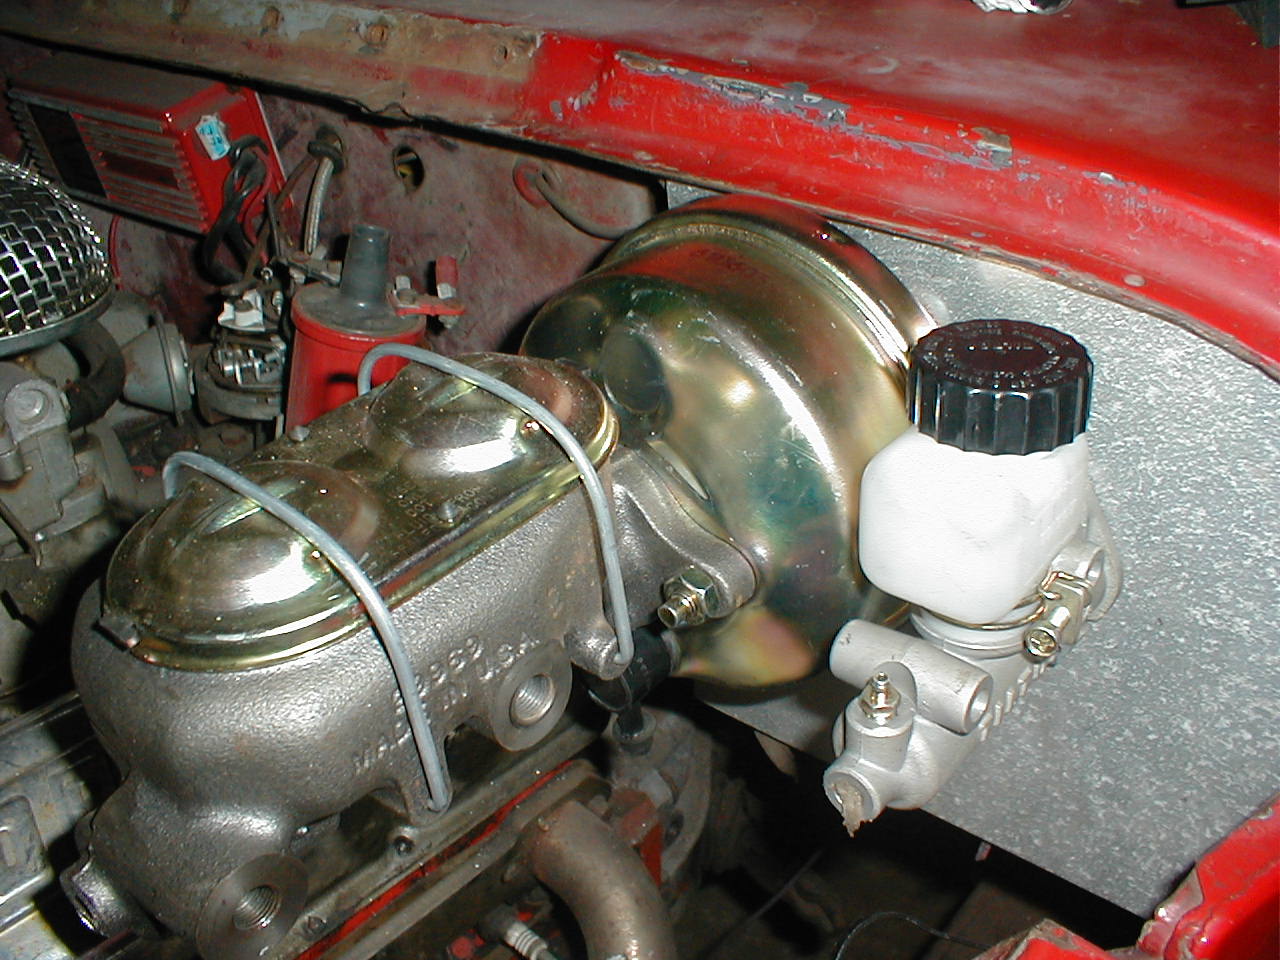
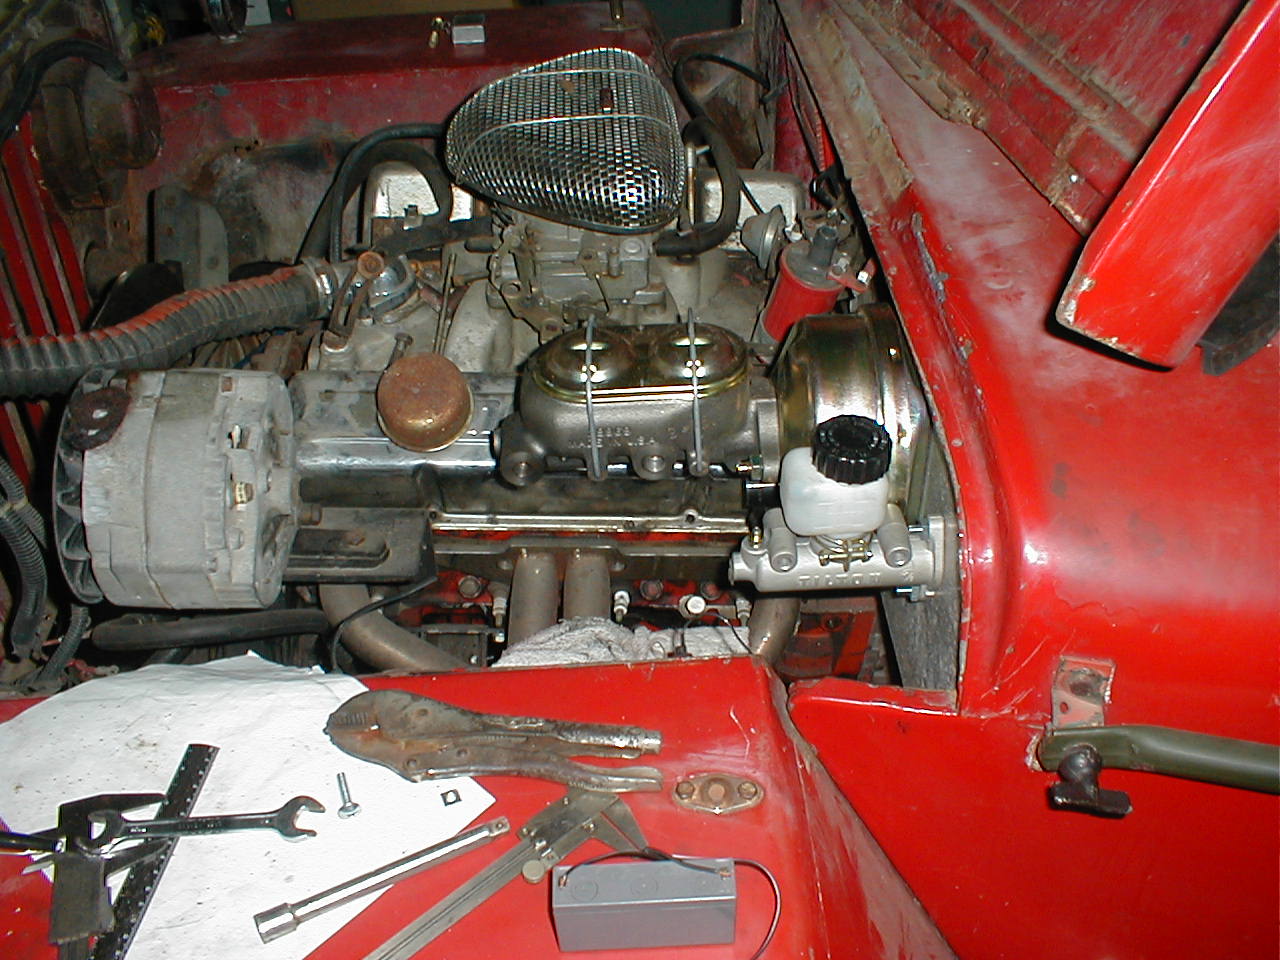
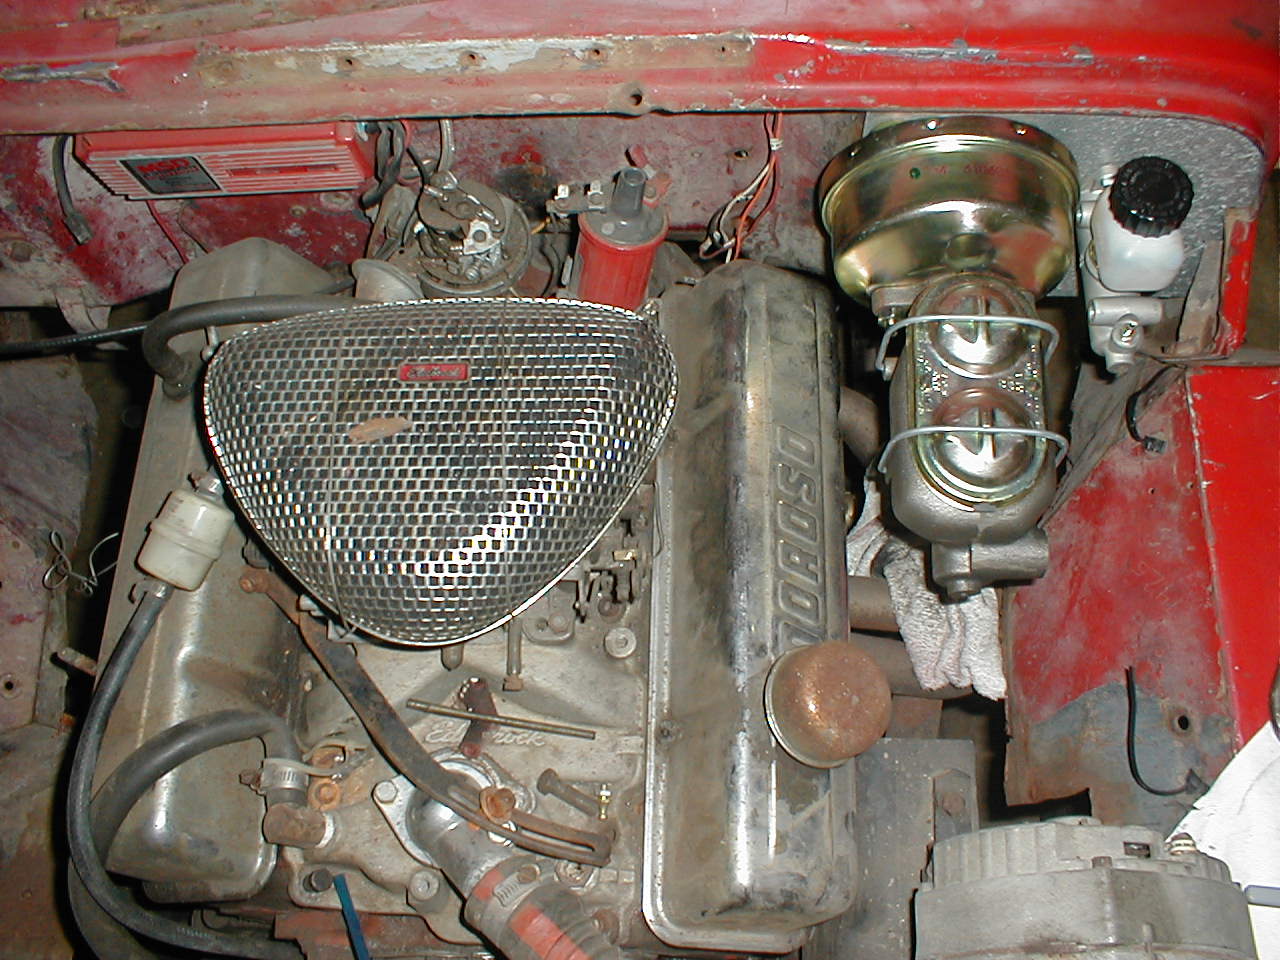
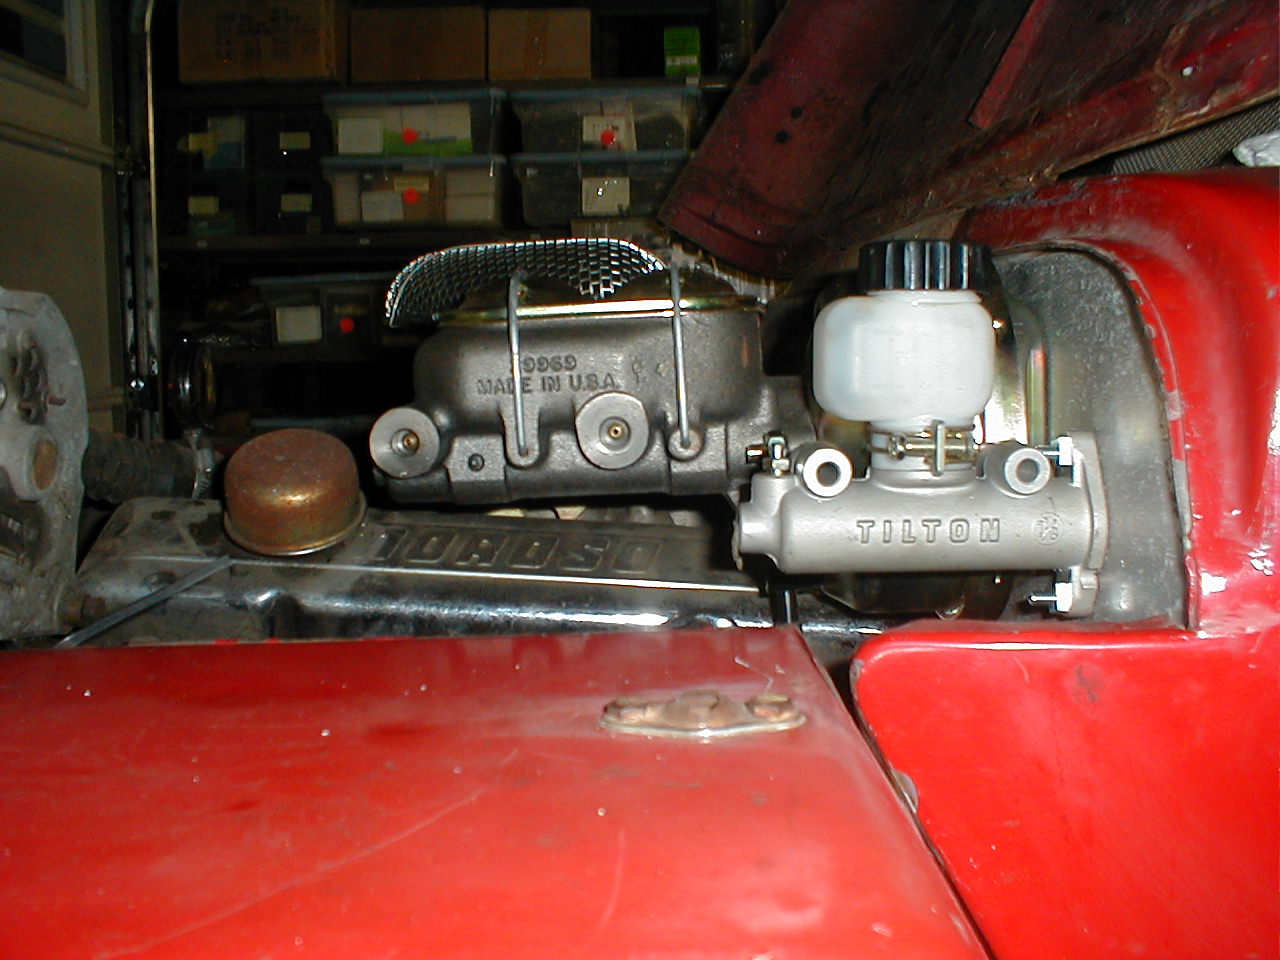
I also wanted to upgrade from the old tandem master cylinder, as the brakes were
only a single cylinder MC. So out came the MC........
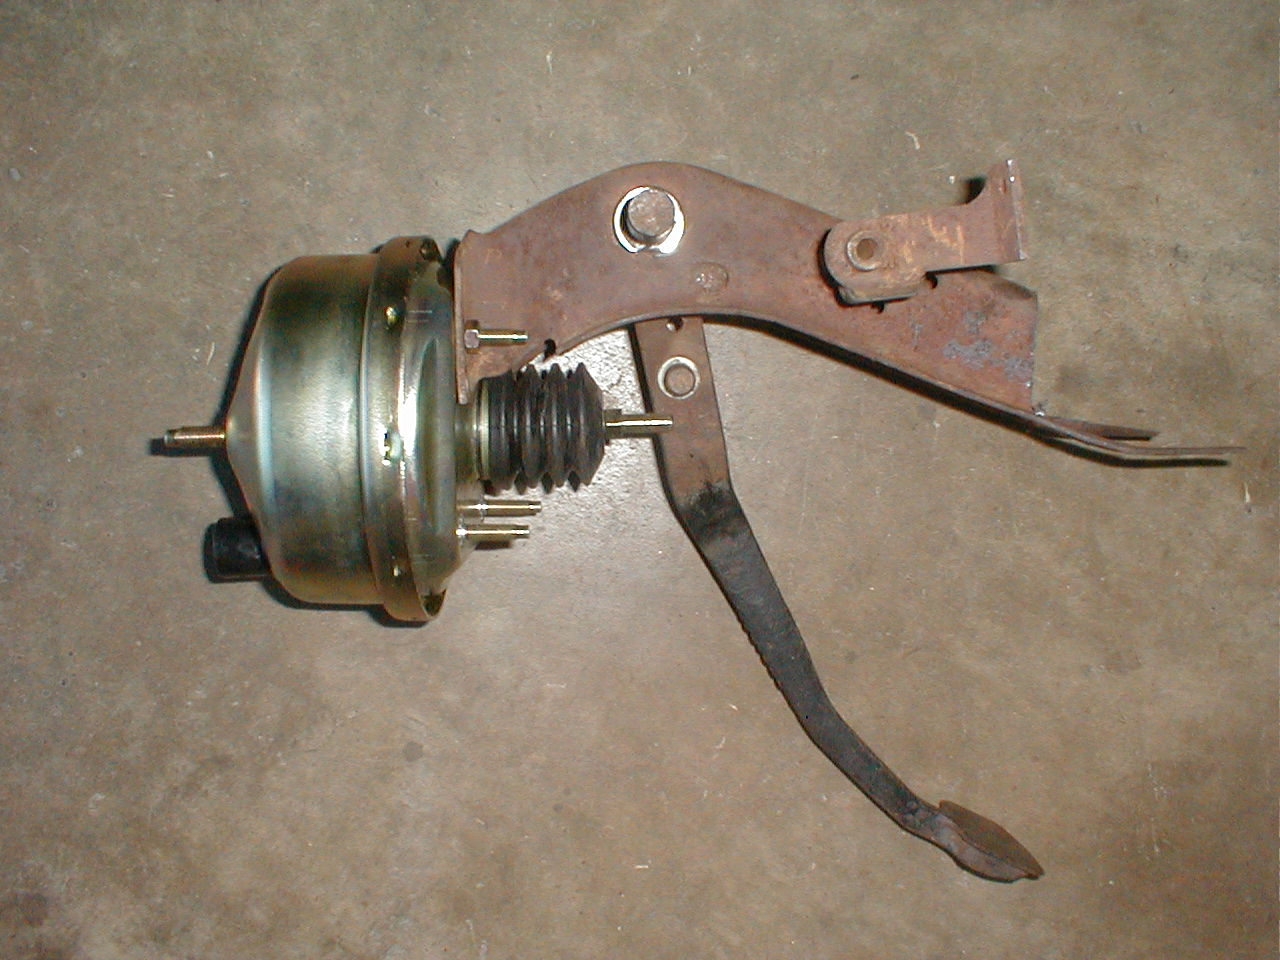
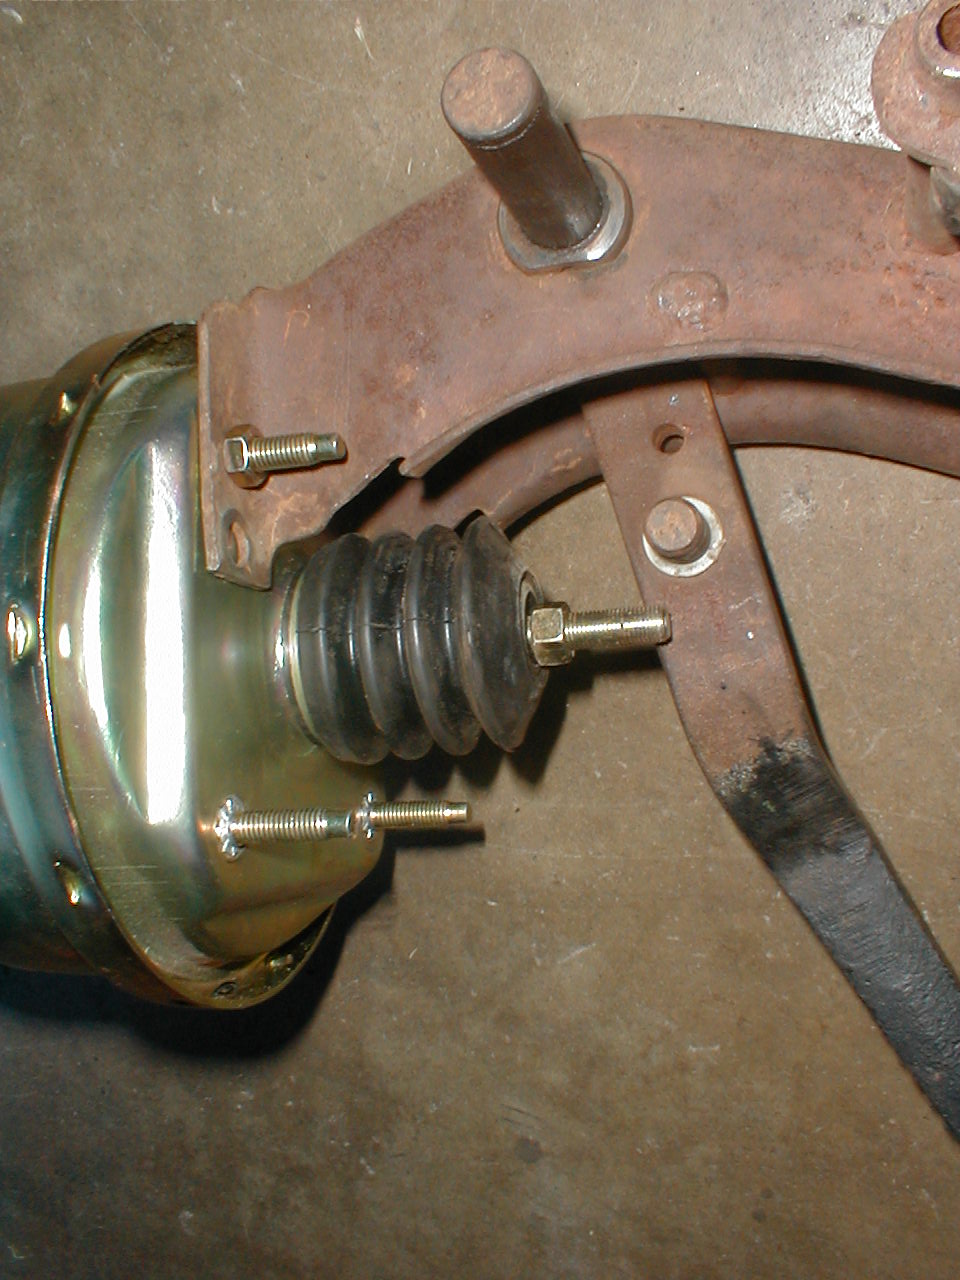
....And in went the new 1" master cylinder with a brake booster. Now WILLY should stop
on a dime!!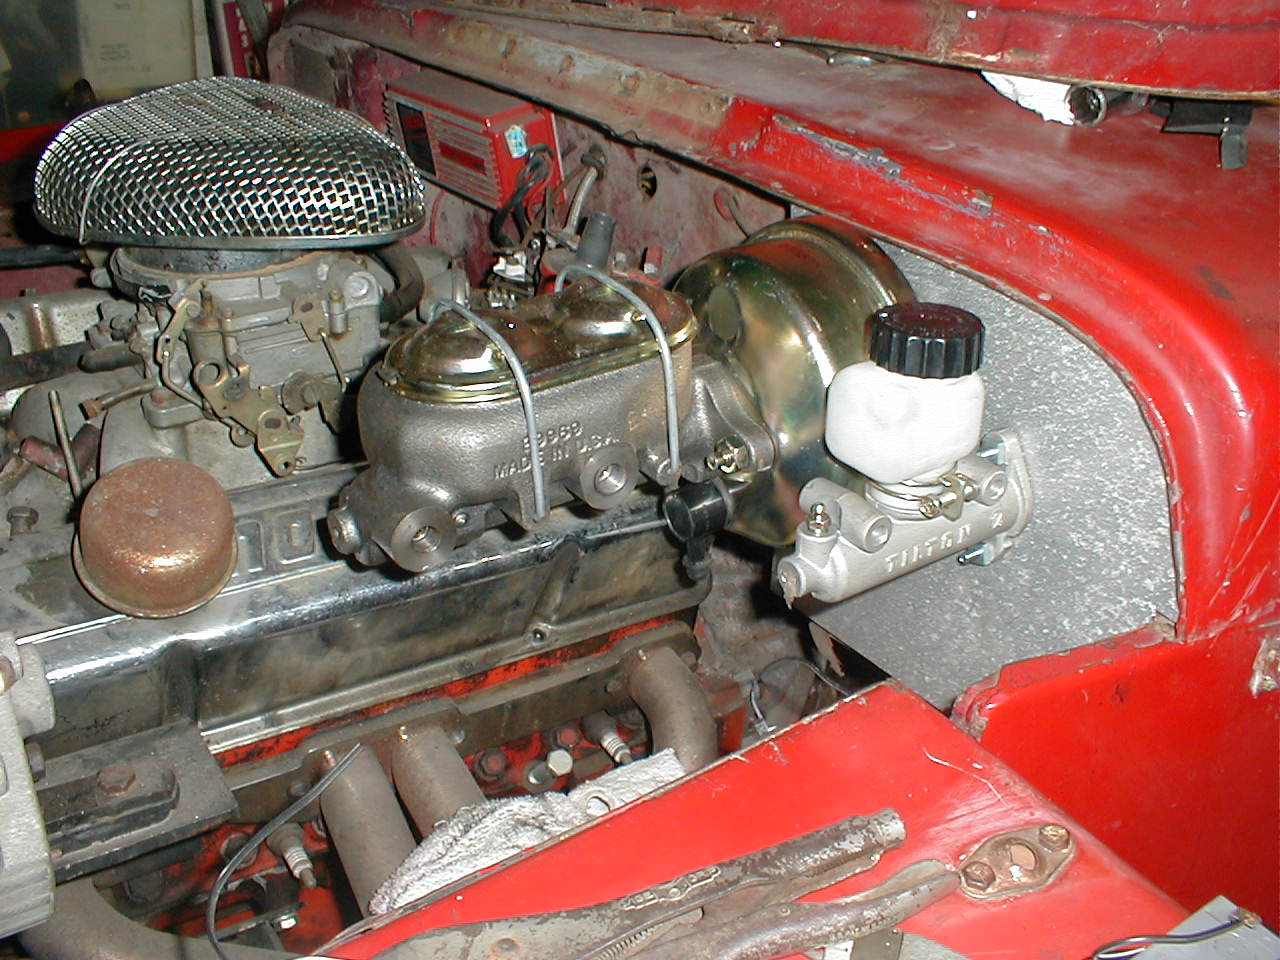
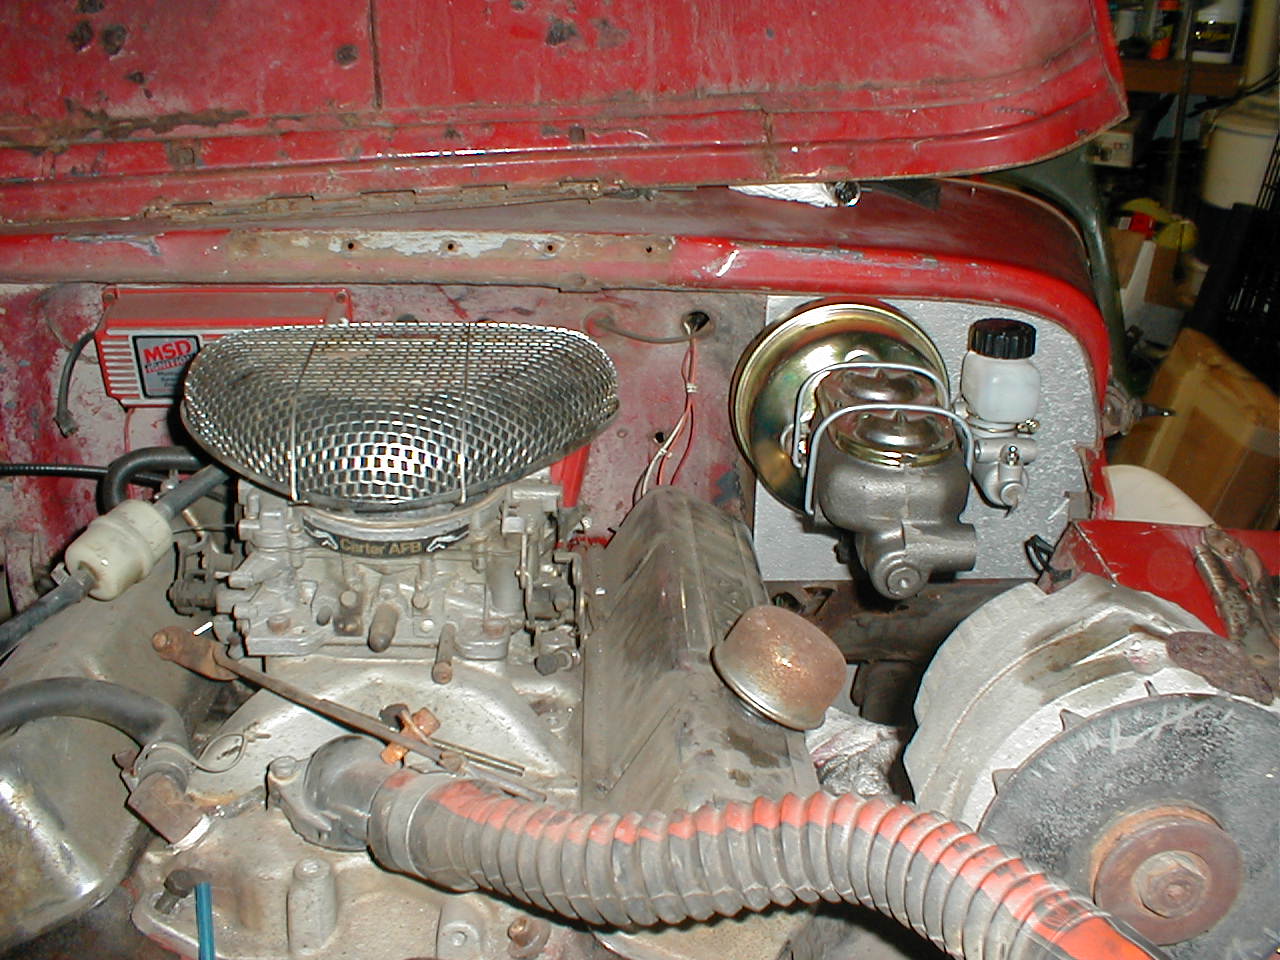
 This required a new MC for the clutch as well as new pedals shown here.
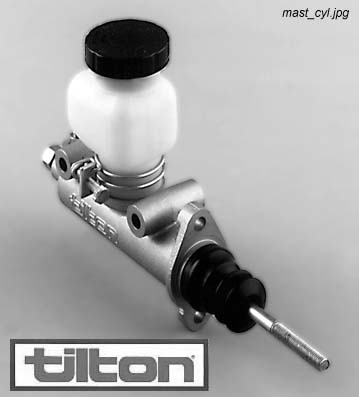

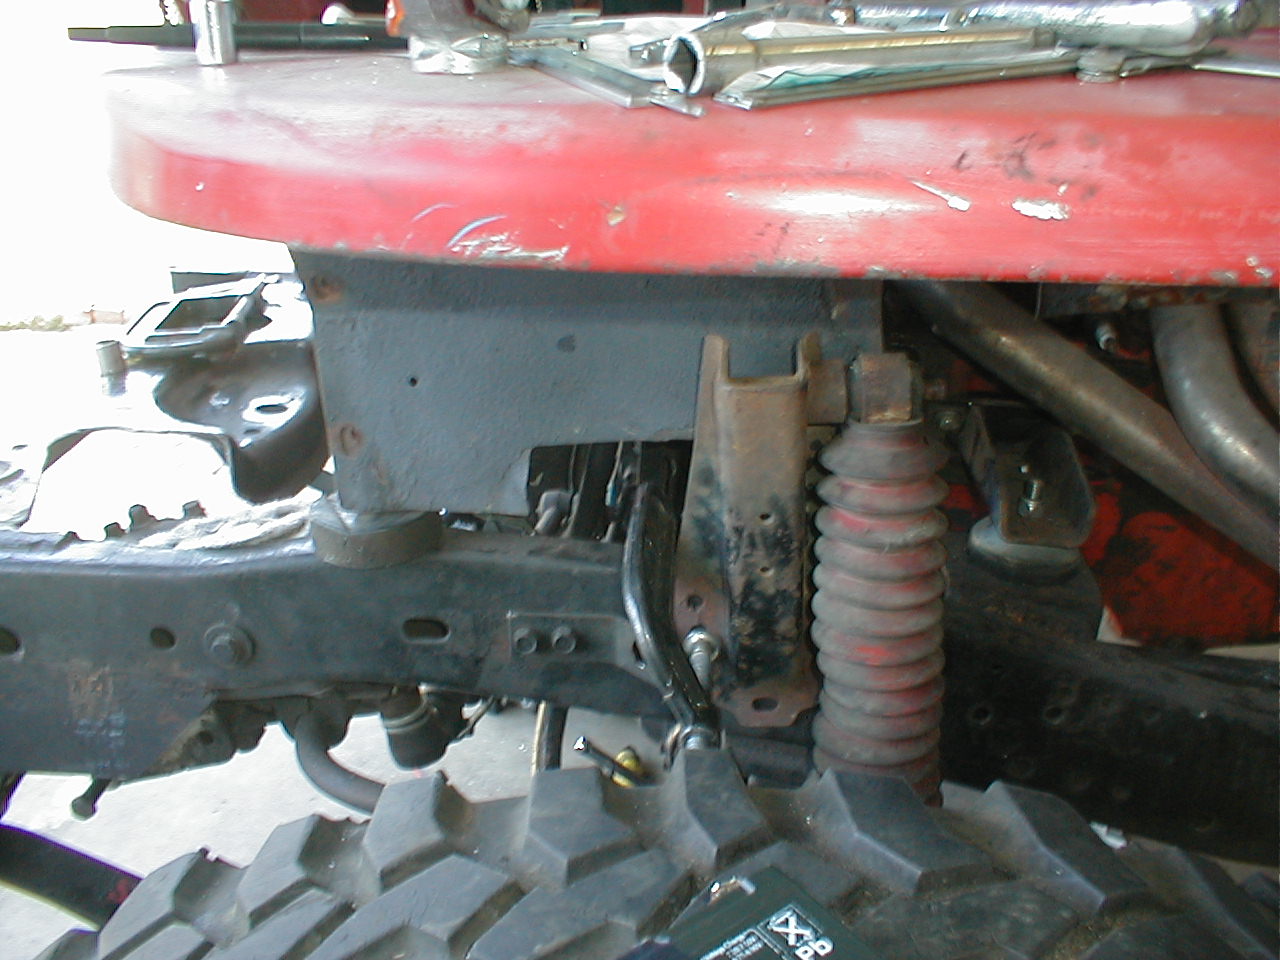
The back suspension is still in the engineering stage. I've got to decide
a nice rear hitch/receiver design and tie it all into the frame. I'm also
going to place my battery(s) back here. Originally my battery was under
the hood, and I mounted the engine toward the drivers side to clear it.
When I slid the engine on this frame, the springs were so flexi that the CJ2A
leaned to that side. I needed to center the engine for weight balance, and
install the battery somewhere else.
I've got great clearance at the X-member around 18"
![]()
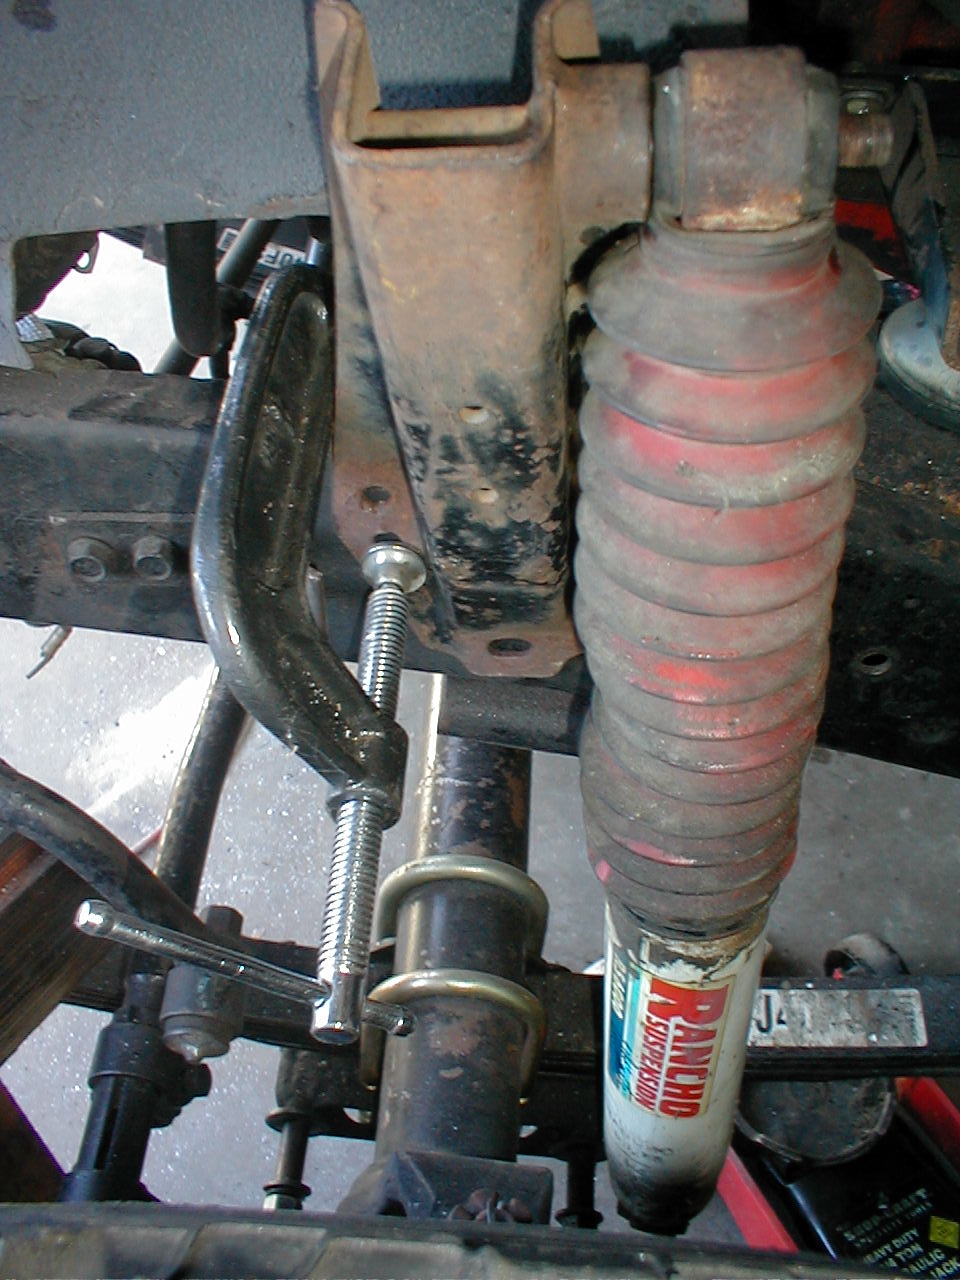
Here's the left front upper shock mount temporarily to check for binding during
articulation.
Here's another view of the mount looking down along the shock.
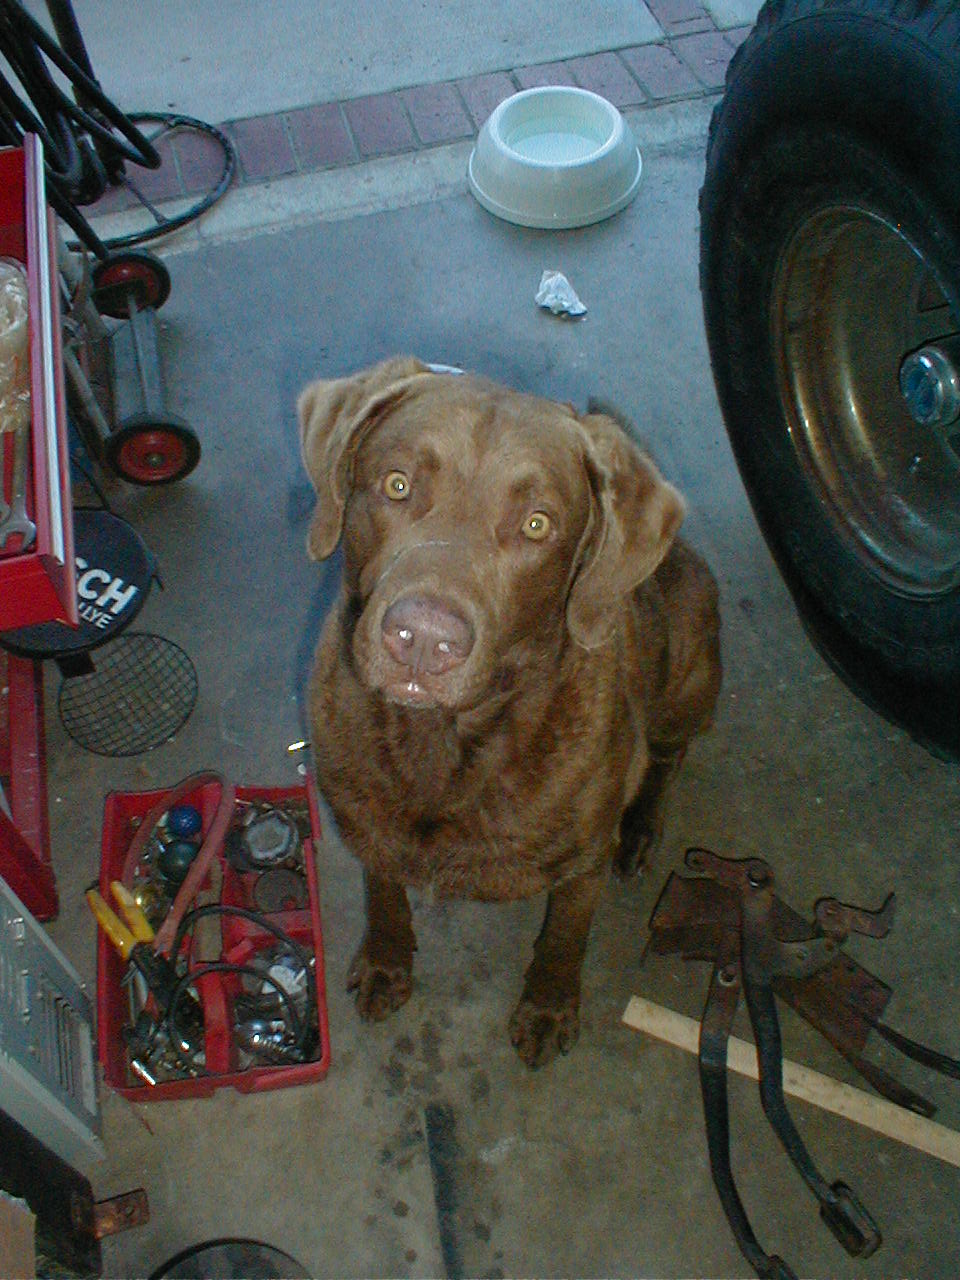
Simon of Cyrene, My faithful companion through the buildup.
He just passed away last year. We're going to miss him.